There are many reasons as to why you would want to uninstall a WordPress application. This can be to save storage space on your domain or you have an old site you no longer want to use.
Step 1: Selecting the Application to Be Uninstalled #
In cPanel, under the Applications section, click on “My Apps”

Step 2: Uninstalling the WordPress Application #
After clicking on “My Apps” you will be brought to a page with several options for your site.
Be sure to double check you are looking at the site you want to uninstall. Once you are sure, click the X button on the rightmost side of the screen (Fig. 2).

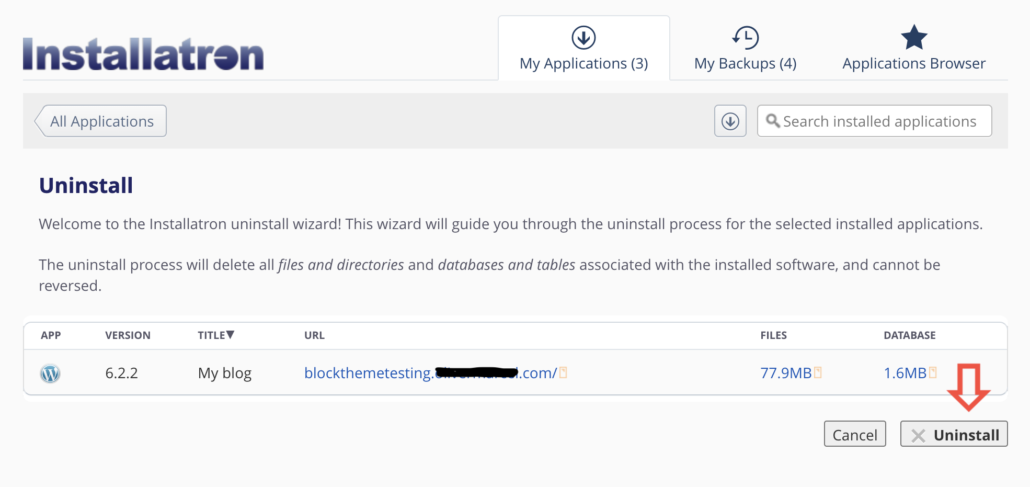
Next you will be brought to a page that confirm that you understand uninstalling this application will delete all of the files, directories, databases, tables associated with the application. Once you’ve confirmed this, click the bottom right button labeled X Uninstall.

Uninstalling the Application #
After you click the X Uninstall button as shown in Figure 3, you will be redirected to your installed applications page. However, you will see that a loading bar has replaced where the URLs to your application once was. The loading time will depend on how much space your application was taking up, but could take about a minute or two.
Step 3: Looking at Your Applications #
To fully ensure that your application has been uninstalled, return to your cPanel and click My Apps again. The application that you have uninstalled will no longer be shown, which means that you have successfully uninstalled it!
Want More Help? #
Check out our Guide on Installing WordPress
Book an appointment with a DKC consultant! We would love to help with all of your WordPress and Domain of One’s Own needs!
Updated by Haley Gosman 10/22/24

