
What is Omeka? #
Omeka is an open-source web platform commonly used for museums, libraries, and archives as a way to digitally store or display collections of digital material and its metadata. It can be installed in the place of WordPress on Domain of One’s Own.
Installation #
Step 1: Launch the Installer #
Head to your Domain of One’s Own’s cPanel. Once you have logged in and reached your cPanel, under featured applications, you need to find Omeka (Fig. 1)

This will take you to a page telling you a little bit about the application you intend to install- in this case, Omeka. When you are ready you can click install this application, which will be located to the right of the screen (Fig. 2).

Step 2: Choosing the settings #
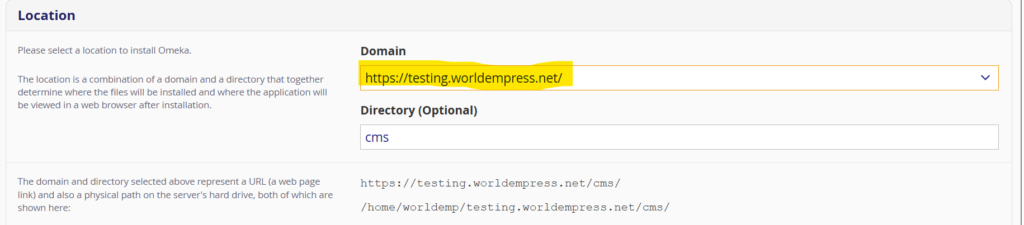
Now you should be on a settings page where you can select what domain you would like to install Omeka.
Location #
Location is where you will choose which domain or subdomain you would like Omeka to install.
Domain #
Under Domain (Fig. 3), you can click the arrow to get a drop-down menu listing your main domain and all of your subdomains. There will be two versions of each domain. One will start with http and another will start with https. It is important to select the one with https as it will make your site more secure.
Directory (Optional) #
Underneath Domain will be a bar labeled as Directory (Optional). You should delete the cms that is auto-filled to this box. If left in, cms will appear at the end of your website’s URL (Fig. 4).

Version #
Below Location is Version. Omeka will automatically be downloaded in the newest version and this should be kept the way it is. Lower down in Version you will have the option to choose whether or not you wish for Omeka to automatically be updated once you download it. We recommend you keep the default settings to ensure your site remains up to date (Fig. 5).

Settings #
The next set of options is under Settings (Fig. 6). Here, you will set an administrator username and password. It is important that you can remember these as you will need them to sign into your account and use Omeka. You can also change your password and username here at any point.
You can change your website title now if you would like to, but if you decide to wait or change the title later, that’s fine.

Final Installation Step #
The final step in installing Omeka is to hit the install button at the bottom right corner (Fig. 7)

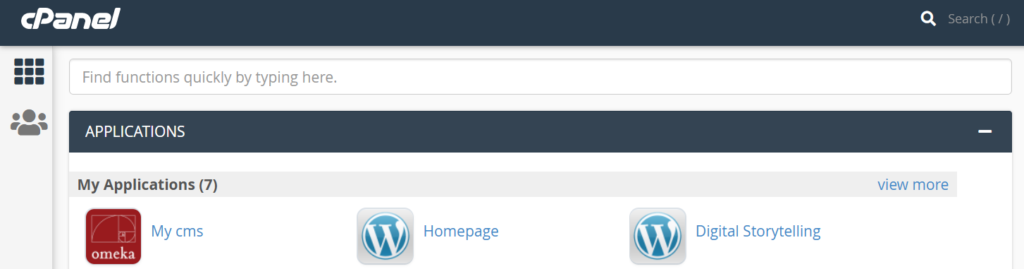
Step 3: Launching Omeka #
Now that Omeka has been installed, you can access your Omeka profile anytime by logging into your cPanel through Domain of One’s Own. Your new Omeka site should be underneath Applications (Fig. 8)
You can click on your new Omeka site. You will be taken to a page with information about your Omeka site and three links (Fig. 9).

The first link will take you to what people visiting your website will see. The second ends with /admin/ and is what you will click to access the back end of your website, where you’ll be able to make edits or add to the Omeka site. The third and final link takes you to forums where people post about Omeka. This is a useful place to find information if you are experiencing issues with your website.
Using the second link, you will have to log in using the password and username that you set up earlier (Fig. 10).

After these are typed in, you will be in the backend of your Omeka account and can start editing.
Themes and Plugins #
Now that your Omeka is up and running, it will probably be helpful to check out the themes and plugins available to you that allow your site to have more capabilities and customization. To do that, you can check out Omeka’s website and can click on Themes or Plugins on the landing page at the top (Fig. 11).

Themes #
Themes affect the layout of your website, and are important when it comes to design. To see the available themes, you click on themes on Omeka (Fig. 12).

These themes can be sorted either alphabetically or by how recently they were added (Fig. 13).

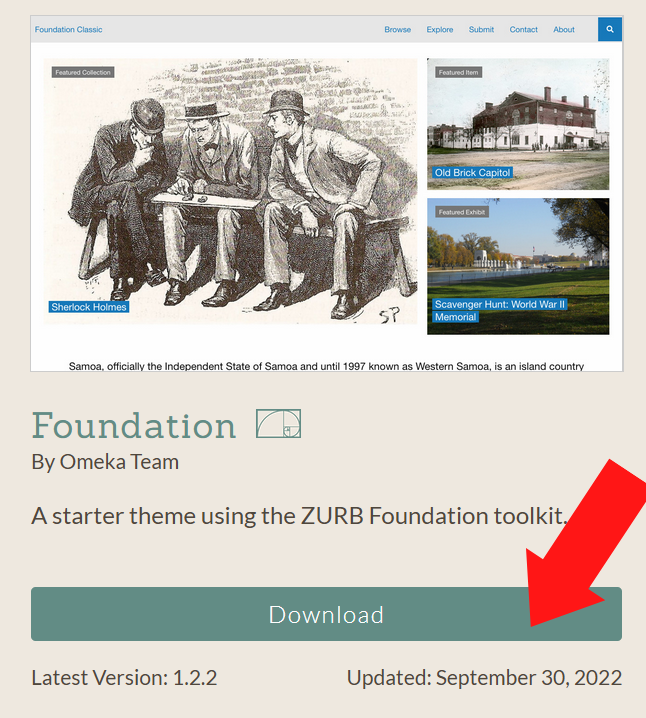
Once you find a theme you like, you can either click on the theme to receive more information about it or hit the download button (Fig. 14).
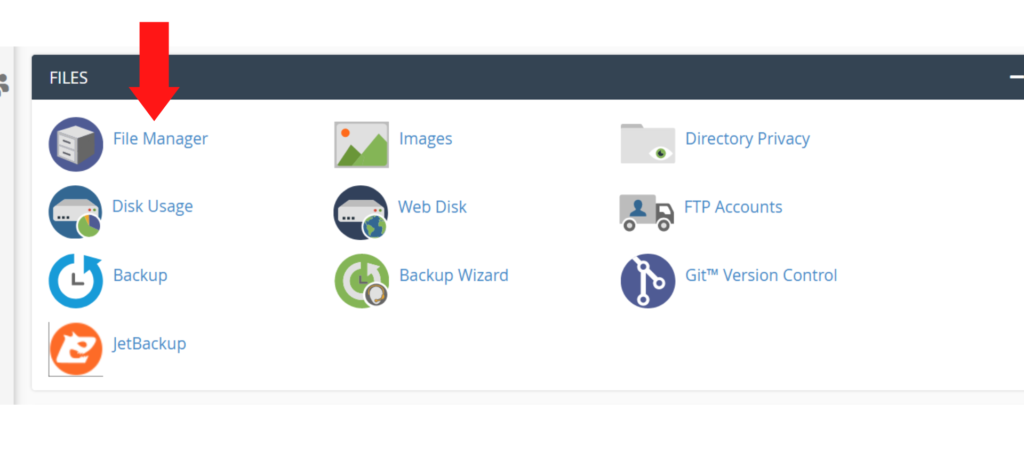
After you click the download button, the theme will be downloaded onto your computer. With the theme downloaded, navigate to your cPanel and scroll down until you find your file manager located underneath Files (Fig. 15).
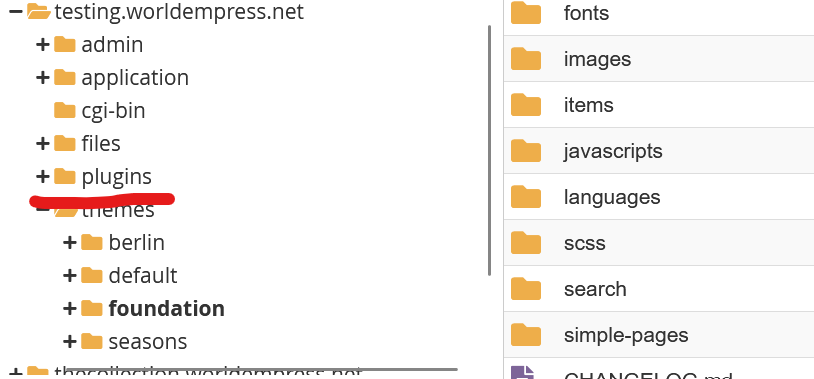
Click on file manager and find your website before clicking on the themes folder (Fig. 16).

Once there, you will want to click on the upload folder at the top (Fig. 17).

You’ll then be prompted to click to select which file to upload (Fig. 18).

Next, you will have to unzip the file that you uploaded. To do that, you will have to click on the zipped file and press extract (Fig. 19).

When you do this, you can add a new name for the unzipped file (Fig. 20).
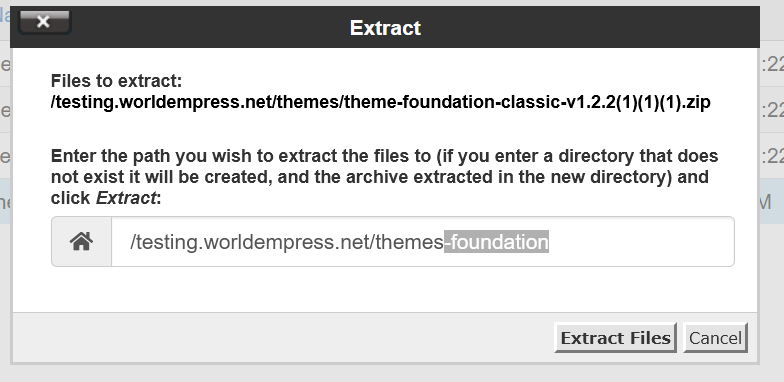
Sometimes these files will end up in the domain folder instead of the folder for themes, so after completing this step, it’s important to look and see where these files may have ended up. If this happens you can drag your theme back into the theme folder.
With a theme now uploaded into your file manager, you can go to the dashboard of your Omeka site and click on appearance (Fig. 21).

Now, on the themes page, you should see a new theme has appeared (Fig. 22).

To activate your new theme, you can click Use this Theme.
If you want to make more adjustments to the theme, you can hit the Configure button (Fig. 23).

Plugins #
You can access plugins the same way as themes. Instead of clicking on themes at the top of Omeka’s website, you can click plugins (Fig. 24). They will also be sorted in the same way, recently added or alphabetically.

When you find the plugin you want you can click on it for more information and when you are ready you can hit the download button (Fig. 25).

Returning to the File Manager, you’ll want to find the folder underneath your domain labeled Plugins (Fig. 26).
Following the same steps as with a theme, you will upload the plugin in and extract it from the zip file.
To activate your new plugin, head to your website dashboard and click on plugins (Fig. 27).

After you click Plugins, you find the plugin you want and hit install (Fig. 28).

After you complete this step, your plugin should be installed and up and running (Fig. 30).

Reviewed by Abby Firestone 06/25/26
