
We’ll now take a look at how you add posts and pages to your WordPress website. In WordPress, you’re able to add different types of content to your site as either a post or a page, depending on what goal you have in mind.
Posts are periodical pieces of content such as blog posts, news articles, reviews, opinion pieces, etc. Posts typically have an author name, date of publication, and the option to allow for comments/discussion.
Pages are for static content on your site which doesn’t necessarily change very often. Examples of pages include your home page, about page, or contact page.
Adding Posts #
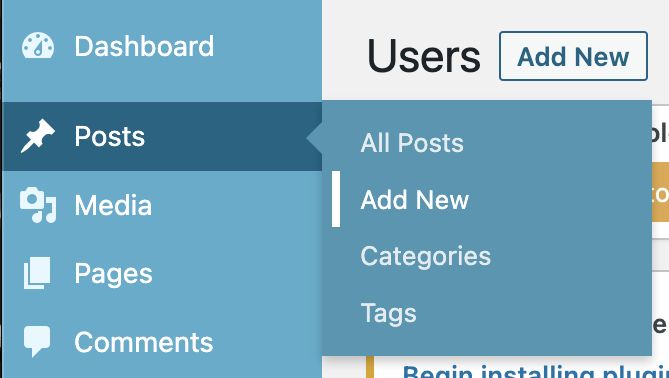
On your dashboard, you’ll see several options on the left-hand menu including Posts.
To add a new post, hover over Posts and click Add New.
You’ll now be taken to the post/page editor (known as the Gutenberg editor), where you can write your posts and add images, videos, audio, and more. To learn more about how to use blocks, check out our WordPress Editor guide.
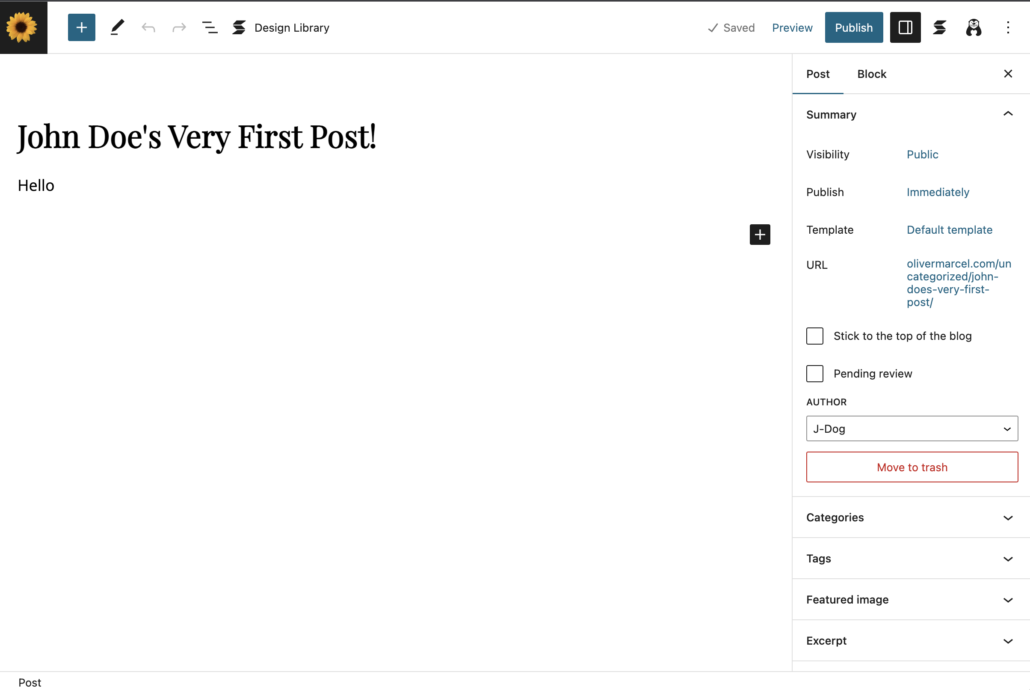
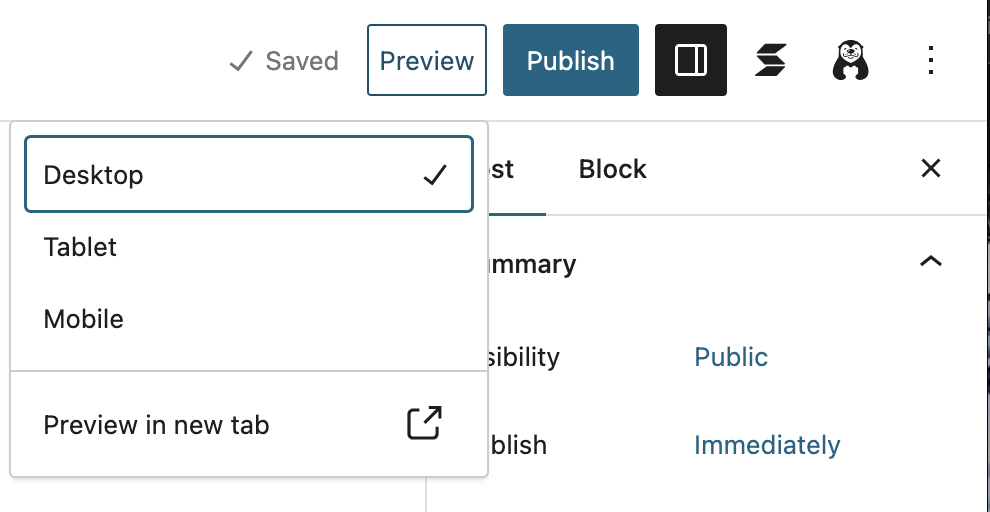
Feel free to click Save Draft to save your work as you go along. You can also select Preview to see what your post will look like once it’s live on the web.
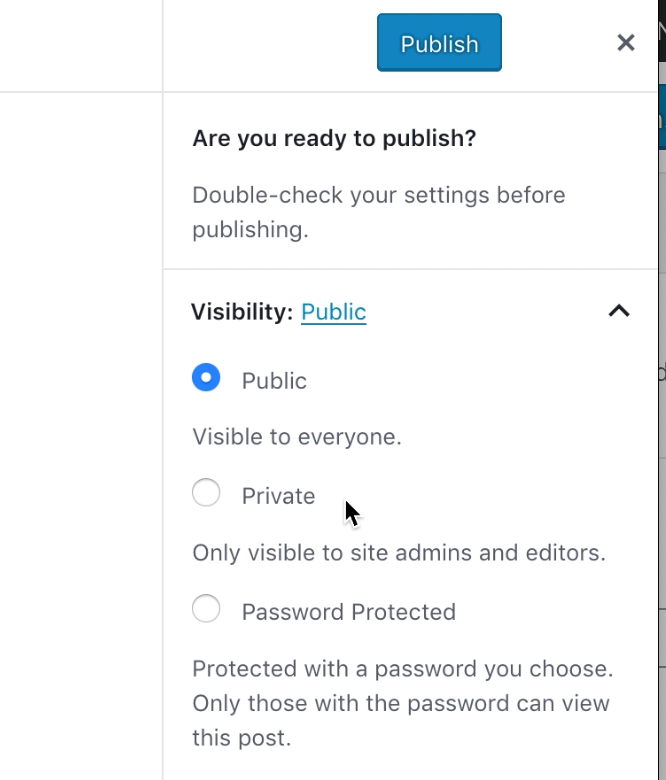
Before your post is published live, WordPress will ask you if you’re ready to publish. Here in the Document settings menu, you can change things like the visibility of your posts, post date (which can be set to a past, present, or future date), and whether you want to add any tags to your post to help keep it organized on your site.
When you’re ready to publish it live on the web, click Publish on the top right of the page.
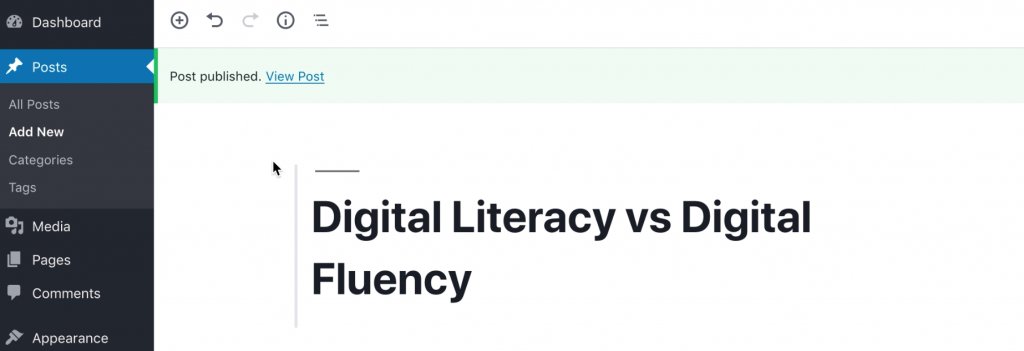
Once your post is live on the web, you’ll see a success message with a link that says “View Post” which redirects you to a user preview of your page/post.
Adding Pages #
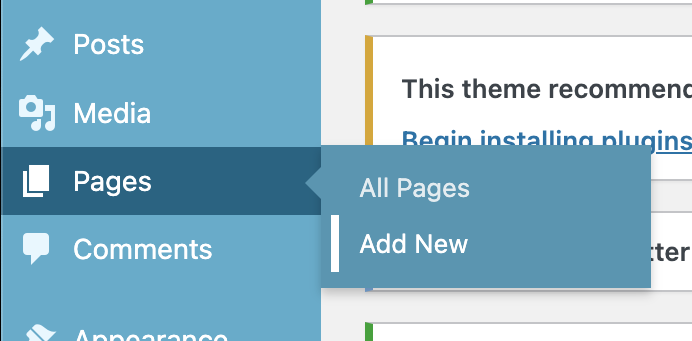
The process for adding pages is almost exactly the same. From your WordPress dashboard, hover over the Pages item in the menu and click Add New.
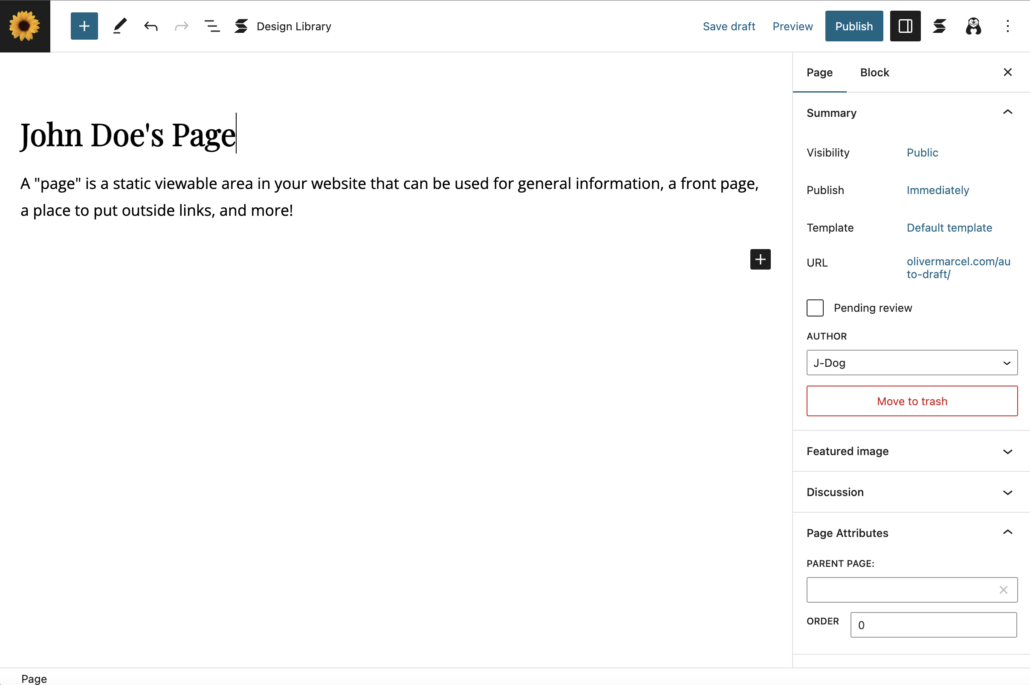
You’ll then be taken to the editor, and just like before with our posts, you can edit the title and add text, images, and other media to your page.
Like before, you can Preview your page, and when you’re ready to publish your page, you click Publish on the top right of the page.
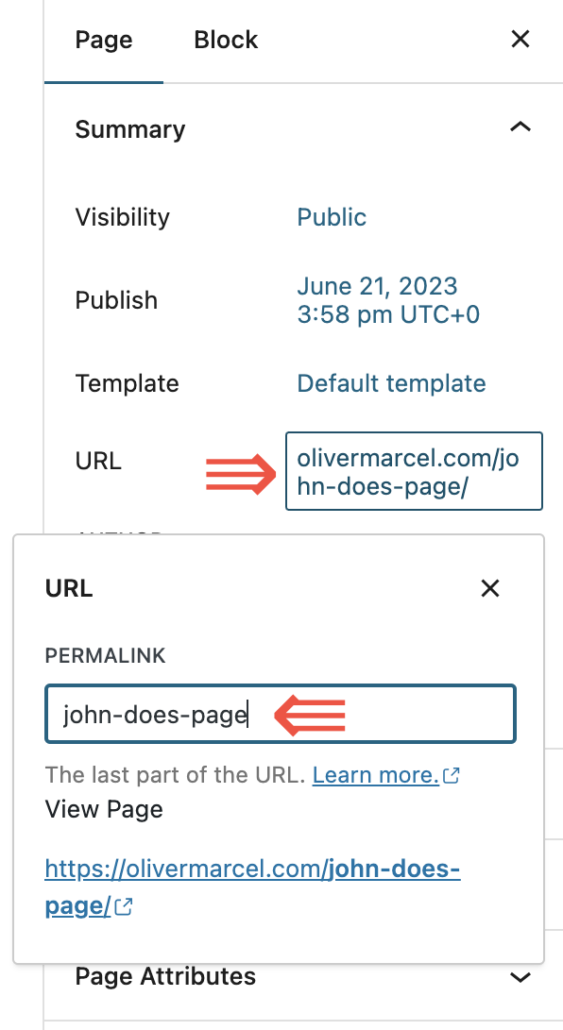
Your page is now live on the web. If you look at the URL in your browser, you can see the link visitors will use to access your page. This is based on your page title and can be left as is or edited by clicking the link next to URL in the Page settings menu on the right side of the page and entering a new value under Permalink.

If you’d like to make your new page the homepage of your website (rather than a list of your most recent blog posts), you can change this in the WordPress settings.
Reviewed by Abby Firestone 06/25/26
