
Once you’ve been set up with a Domain of One’s Own account, you’ll be able to install a number of different applications to help you create a website or digital repository. WordPress is just one example, but it’s the most popular content management system on the web today, so it’s a great choice if this is your first website.
If you need to install WordPress on Domain of One’s Own we recommend you follow this video to get started:
Step 1: Launch the Installer #
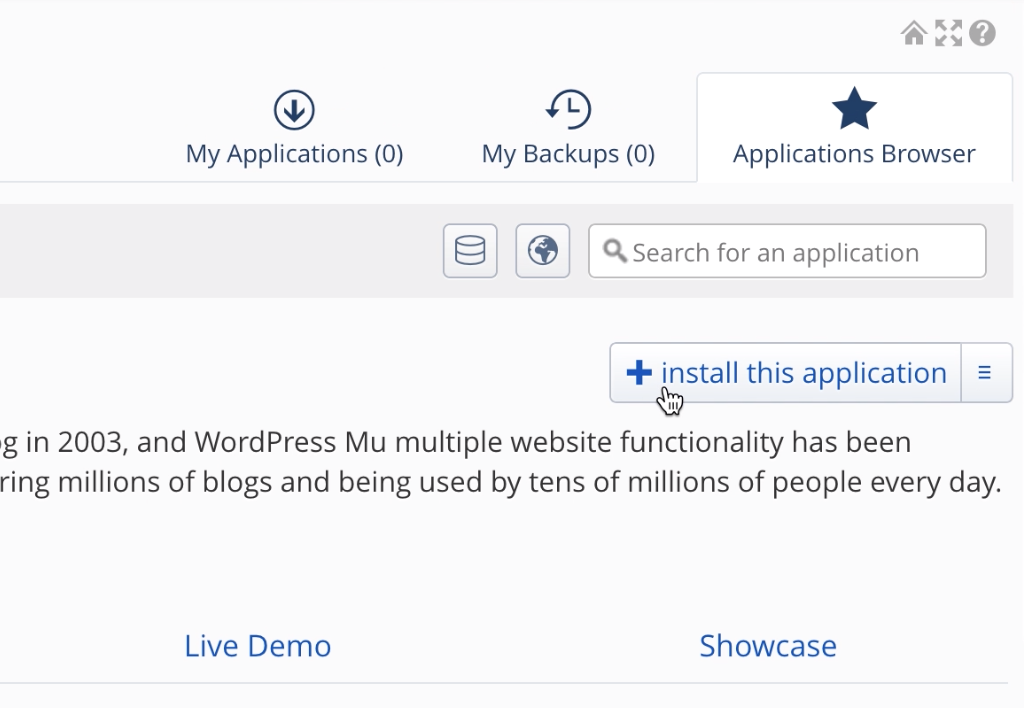
In cPanel, under the Applications section, click on WordPress (Fig. 1). This will launch the application installer where you can read about what WordPress is and decide if it’s the right content management system for you.

Once you’re ready to go, click Install this application on the right (Fig. 2).
Step 2: Choosing the settings #
You’ll now be taken to a settings configuration page. Here you can choose where you want to install this instance of WordPress.
Location #
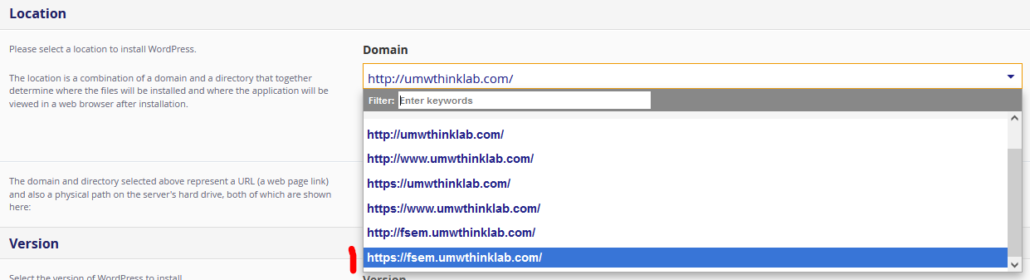
When installing WordPress you’ll be presented with several options of places where to install it. The first thing we recommend, whether installing at your root directory or a subdomain, is that you install your WordPress application at the https location. You’ll have to select this from the drop-down options (Fig. 3).
In the example below if we are installing at our root directory we would choose https://umwthinklab.com.

Root Directory #
By default, WordPress will want to install at your root directory (that is your main URL, https://yourdomain.com) and add the word “blog” as a directory (Fig. 4).

This means that the application will be at the URL https://yourdomain.com/blog. We highly recommend removing the word ‘blog’ from the URL (Fig. 5).

Subdomain #
Before you install your WordPress application in a subdomain you’ll first need to create a subdomain. Please follow our “Create a Subdomain” guide for these steps.
Next, in the location drop-down, you’ll select the https version of the subdomain you’ve created (Fig. 6).
Just as if you were installing at your main domain, by default WordPress will append “blog” as a directory. This means that the application will be at the URL https://subdomain.yourdomain.com/blog. We highly recommend removing the word blog from the URL (Fig. 7).

Version #
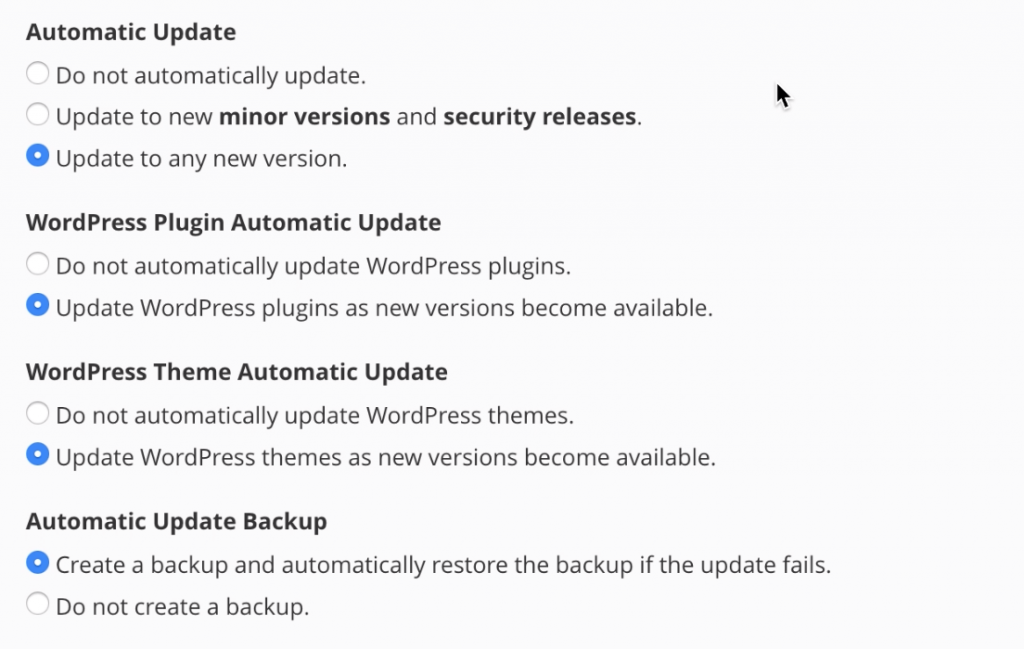
By default, Installatron will install the latest version of WordPress. You should keep this as is. Additionally, WordPress will also give you options for updates (Fig. 8). We recommend keeping the default options as this is the best way to keep your WordPress site secure through automatic updates.
Settings #
You can leave the account name and password as they are as you’ll only ever need to use your university login credentials to access your Domain of One’s Own cPanel dashboard.
Then, just give your blog/website a name and description. Don’t worry you can change this later if you don’t know what you want to title your site.
Leave the Limit Login Attempts, Multisite and Advanced Setting Management defaults as they are for the installation (Fig. 9).

Once you hit the end click the Install button. It will take a minute for the application to install.
That’s it! You’ve successfully installed WordPress!
Step 3: Launching WordPress #
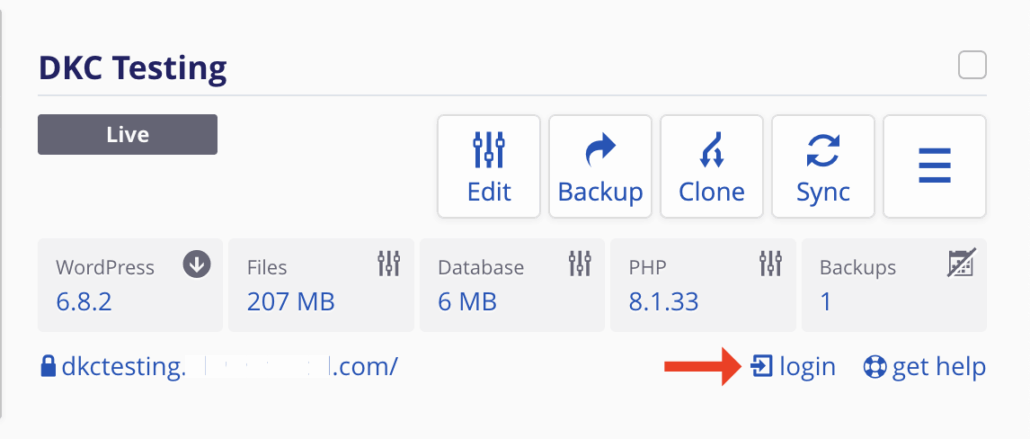
You’ve now got a WordPress installation up and running. Anytime you want to work on your site, just log into your cPanel dashboard through the Domain of One’s Own website. Under My Apps, you’ll see your WordPress site. Clicking on that brings you to this screen, clicking the login button on the right opens up your WordPress dashboard where you can edit your site.
This content is adapted from Coventry.Domains DoOO Support by Coventry.Domains which is licensed under CC BY-NC 4.0
Updated by Oliver Marcel 7/16/2025
